
How to Build a Backyard Pickleball Court: 5 Easy Steps
 pickleballcourtsflorida@gmail.com
Almost 22.7 million Americans play pickleball. It is the fastest-growing sport in the world. In some areas, there are not many courts to play on. Many pickleball lovers do not play it due to far-away courts. I also face this problem. Choose a good pickleball team name with this guide. I always asked how to build a backyard pickleball court to my friends
Then I sorted it out by building a backyard pickleball court. Guys, you can not believe I made my own pickleball court in the backyard. Now I can play pickleball daily with my family. At night, the whole family enjoy together. Let’s break down the steps to create a backyard pickleball court.
- Why Build a Backyard Pickleball Court?
- Plan Your Backyard Pickleball Court
- Step 1: Choose Your Location and Size
- Step 2: Choose the Right Court Surface
- Step 3: Paint and Mark the Court
- Step 4: Install the Net and Accessories
- Step 5: Finish and Test Your Court
- How Much Does a Backyard Pickleball Court Cost?
- Backyard Pickleball Court Ideas
- H2: Common Mistakes to Avoid
- H2: FAQs
- Conclusion
Why Build a Backyard Pickleball Court?
I always wanted a pickleball court at my home. Going to public courts takes time, and sometimes they are too crowded. Many times, I wait for my turn. That’s why I decided to build my backyard pickleball court. It was one of the best decisions for my family. How to control a hot pickleball paddle? Read this guide to learn with simple steps.
Benefits
Now I can play pickleball whenever I want. There is no waiting and no long drive. My family also joins me, and we enjoy playing together. We even play at night after dinner. It is also a great way to stay active, have fun, and spend more time together. If you love pickleball, having your own court makes life much easier.
DIY vs Professional
At first, I thought of hiring a professional to design my pickleball court. But then I realized that I could do some work myself and save thousands of dollars. If you already have a concrete surface, building your own court is much easier.
For bigger jobs like pouring concrete or leveling the ground, hiring professionals is a smart choice. You can also do both by letting experts build the foundation and finishing the rest yourself. This saves money and still gives you a great backyard pickleball court.
Plan Your Backyard Pickleball Court
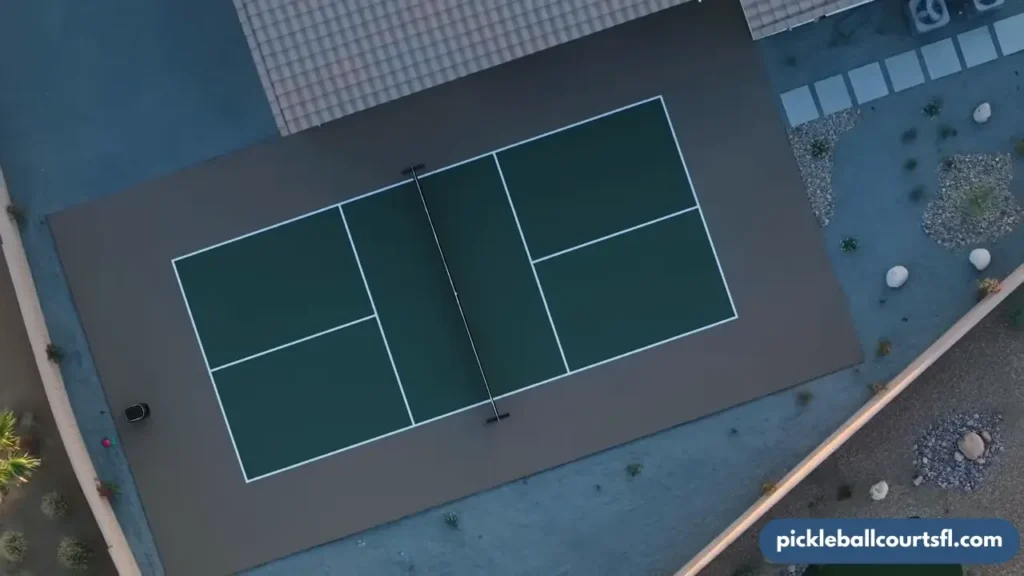
Before you start building, spend some time planning your backyard pickleball court. Good planning saves money, time, and extra work later. I planned everything before starting, and it made the whole project much easier. Here are a few things you should check first. Do you want to make your pickleball paddle grip bigger? Read this guide and do it easily.
Pickleball Court Dimensions
The first thing I checked was the court size. A standard pickleball court is 20 feet wide and 44 feet long. You also need extra space around the court so you can move safely during the game. If your backyard is small, you can also build a practice court. Measure your space carefully before you start.
Choose the Right Location
Pick a flat and open area in your backyard. This makes the building process much easier. I also made sure there were no trees, large roots, or anything that could get in the way. If you already have a concrete patio or driveway, you may be able to use it and save money.
Check Drainage and Sun Direction
Water should never stay on your court after rain. A small slope helps water drain away. I also planned my court from north to south. This keeps the sun out of your eyes while playing during the day. These small details make a big difference later.
Decide on Your Budget
Your budget will help you decide how to build your court. If you want to save money, you can do some work yourself and hire professionals only for the concrete base. You can also start with a portable net and add lights or fencing later. Planning your budget early helps you avoid unexpected costs.
Step 1: Choose Your Location and Size
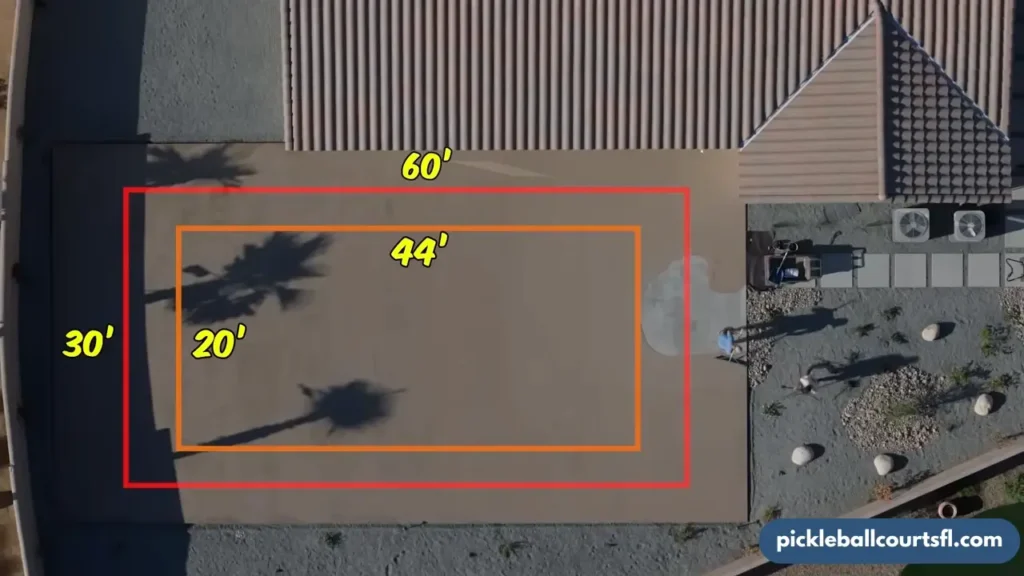
The first step is choosing the right place for your backyard pickleball court. I spent a good amount of time on this because the location can affect the whole project. A little planning now will save you a lot of work later.
Clear and Level the Ground
Start by clearing the area where you want to build the court. Remove grass, rocks, roots, and anything else that gets in the way. The ground should be as flat as possible. If your backyard has a slope, you may need to level it before moving to the next step.
Existing Driveway or Concrete Slab
If you already have a concrete driveway, patio, or sports court, you may not need to build a new foundation. This can save you a lot of money. Just make sure the surface is smooth, strong, and free from large cracks. A good concrete slab is a great place to start.
Foundation Basics
If you are building from scratch, you need a strong foundation. Most homeowners choose concrete because it lasts longer and needs less maintenance. Asphalt is another option, but concrete is usually the better choice for a backyard pickleball court. Once the foundation is ready and fully cured, you can move on to painting and marking the court.
Step 2: Choose the Right Court Surface
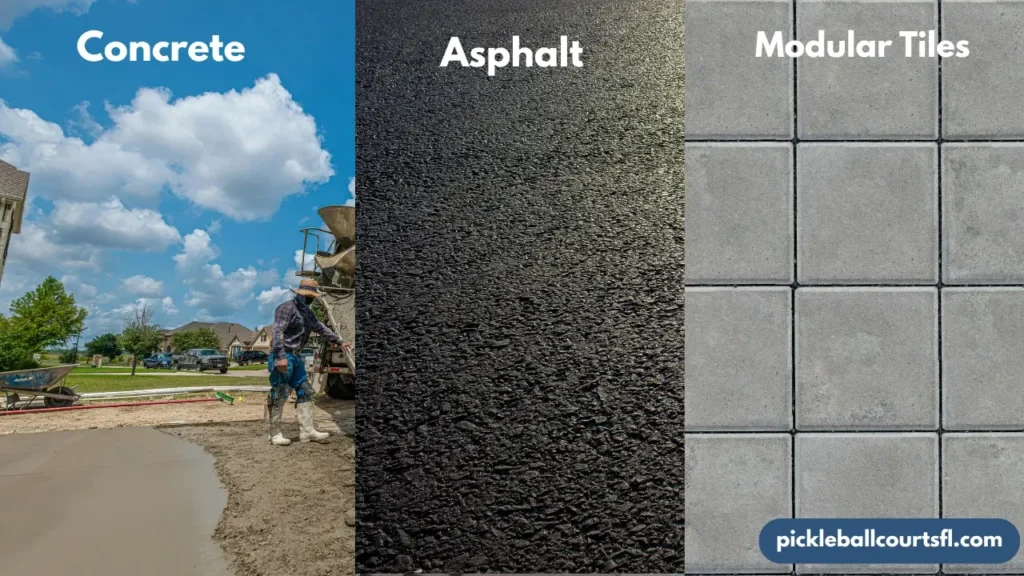
The next step is choosing the right surface for your backyard pickleball court. This is one of the most important parts because it affects how the ball bounces and how long your court will last. I spent some time comparing different options before making my choice.
Concrete
Concrete is the most popular choice for backyard pickleball courts. It gives a smooth and even playing surface that lasts for many years. It also needs very little maintenance after installation. If you are building a new court, I think concrete is the best long-term option.
Asphalt
Asphalt is another good option and usually costs a little less than concrete. It provides a nice playing surface, but it may crack over time if it is not maintained well. Many public courts use asphalt because it is more affordable.
Modular Tiles
Modular tiles are easy to install and work well over an existing concrete surface. They also provide a little extra comfort under your feet. If you do not want to paint the court, modular tiles can be a quick solution. However, they usually cost more than a painted court.
Which Surface Is Best?
After looking at all the options, I chose concrete because it is strong, smooth, and lasts for years. If you already have a concrete patio or driveway, you can simply clean it, repair any cracks, and paint the court. If you want to save money, asphalt is a good choice. If you want the easiest installation, modular tiles are worth considering. Choose the surface that fits your budget, space, and long-term plans.
Step 3: Paint and Mark the Court
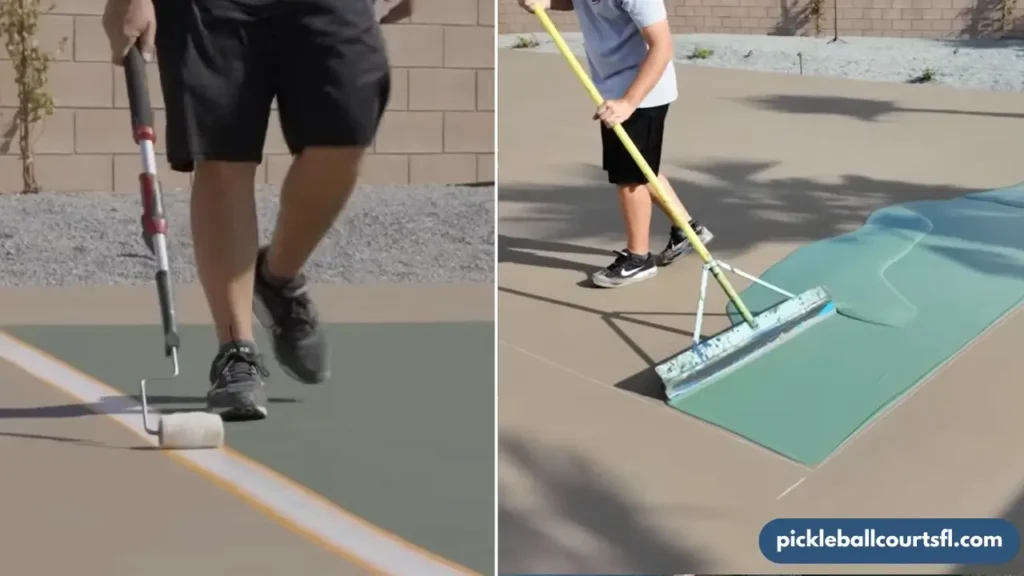
After the court surface is ready, it is time to paint and mark your backyard pickleball court. This is the most exciting part because your court finally starts to look like a real pickleball court. Take your time during this step because clean lines and a good finish make a big difference.
Court Colors
Choose colors that are easy to see while playing. Most backyard pickleball courts use a blue playing area with a green border, but you can pick any colors you like. I chose colors that matched my backyard and made the white lines easy to see. Use a good-quality court paint made for outdoor sports surfaces.
Official Line Measurements
Once the paint dries, measure the court carefully before marking the lines. Use a measuring tape, chalk line, and painter’s tape to keep every line straight. The official court lines should be 2 inches wide. Double-check every measurement before painting because fixing mistakes later takes extra time.
Sealing the Surface
The final step is sealing the court surface. A good sealer protects the paint from sunlight, rain, and daily use. It also helps the court last longer and makes cleaning much easier. After the sealer dries completely, your backyard pickleball court is ready for the next step.
Step 4: Install the Net and Accessories
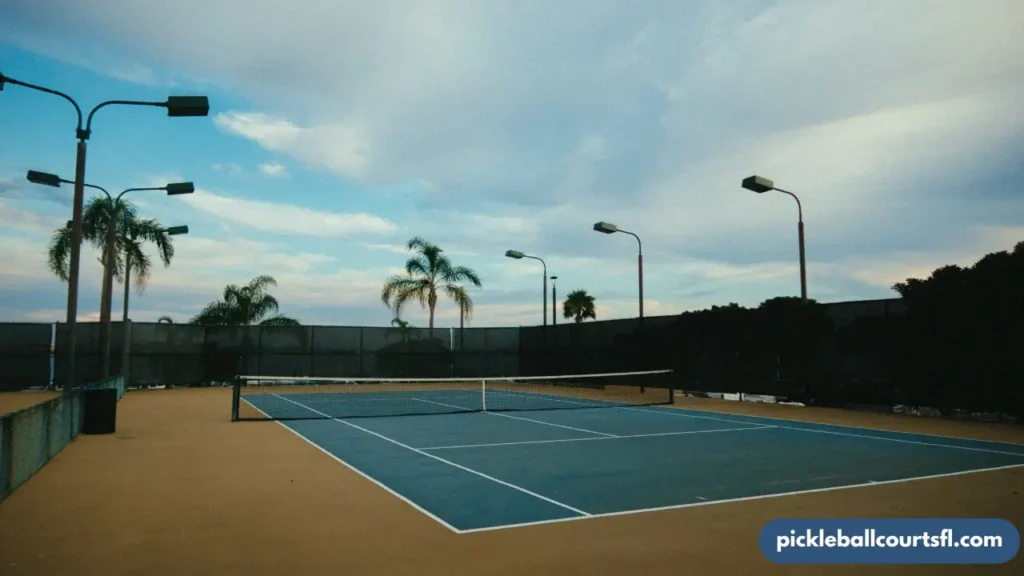
Now your court is almost ready. The next step is installing the net and adding a few accessories. These small things make your backyard pickleball court look complete and give you a better playing experience.
Net Height
Start by installing a regulation pickleball net. The net should be 36 inches high at both sidelines and 34 inches high in the center. You can choose a permanent net if you play often or a portable net if you want to move it when needed. I started with a portable net, and it worked really well.
Fencing
A fence is not required, but I think it is a great addition. It keeps the ball inside the court, so you spend less time chasing it. If your backyard has enough space, adding a fence will make every game more enjoyable.
Lighting
If you enjoy playing in the evening like my family does, install a few LED lights around the court. Good lighting helps you see the ball clearly and makes night games much more fun. Place the lights high enough so they do not shine directly into the players’ eyes.
Benches (Optional)
You can also add a bench or two beside the court. It gives players a place to rest, keep water bottles, paddles, and extra pickleballs. This is optional, but it makes your backyard pickleball court feel more complete and comfortable.
Step 5: Finish and Test Your Court
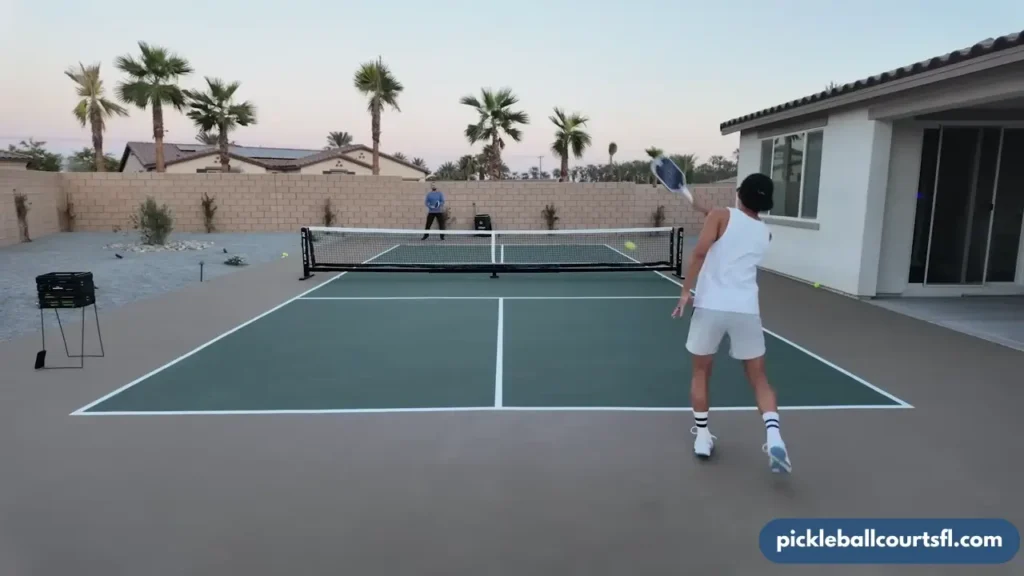
Your backyard pickleball court is almost complete. Before you start playing, take a little time to check everything one last time. A few simple checks now can save you problems later.
Final Inspection
Walk around the court and make sure everything looks good. Check that the paint is fully dry, the lines are straight, and the net is at the correct height. Look for any cracks, uneven spots, or loose parts. If everything looks fine, your court is ready to use.
First Game
Now comes the best part. Invite your family or friends and play your first game. This is also a good time to see if the ball bounces well and if the court feels comfortable to play on. My family could not wait to start our first match, and it was worth all the hard work.
Simple Maintenance Tips
You can keep your court clean through these tips. Sweep leaves and dirt regularly to keep the surface smooth. Wash the court with water when needed, and repair small cracks before they get bigger. If the court lines start to fade after a few years, repaint them to keep your backyard pickleball court looking fresh.
How Much Does a Backyard Pickleball Court Cost?
Building a backyard pickleball court is not cheap, but you can save a lot of money if you do some work yourself. The total cost depends on your court size, surface, and the extra features you add. I found that building part of the court myself helped me stay within my budget.
DIY Cost
If you already have a concrete slab or driveway, your project can cost much less. You only need to pay for court paint, a net, and a few accessories. Even if you build a new court, doing the painting and final setup yourself can save thousands of dollars. Many homeowners spend around $20,000 to $25,000 on a DIY backyard pickleball court with a new concrete base.
| Item | Professional Cost | DIY Cost |
| Concrete Base | $25,000–$35,000 | $20,000 |
| Court Painting | $8,000–$15,000 | $4,000 |
| Lighting (Per Pole) | $2,500 | $200 |
| Estimated Total | $38,000–$55,000 | $24,400 |
Professional Cost
Hiring professionals is the easiest option because they handle everything from preparing the ground to painting the court. It also gives you peace of mind, especially if your backyard needs excavation or a new concrete foundation. A professionally built backyard pickleball court usually costs between $38,000 and $55,000, depending on your location and project.
Cheapest Way to Build a Pickleball Court
The best way to save money is to use an existing concrete driveway or patio if you have one. You can also paint the court yourself, buy a portable net, and add lights or fencing later. I found that doing these simple things reduced the total cost by thousands of dollars without affecting the playing experience.
Backyard Pickleball Court Ideas
Every backyard is different, so your pickleball court does not have to look the same as everyone else’s. While planning my court, I looked at many different ideas before choosing the one that worked best for my space and budget. Here are a few ideas you can also consider.
Small Backyard
Do not worry if your backyard is not very large. You can build a smaller practice court to work on your serves, dinks, and volleys. It may not be full size, but it is still a great way to practice at home.
Multi-Sport Court
If your family enjoys different sports, build a multi-sport court. You can add lines for pickleball, basketball, or badminton on the same surface. This gives everyone something to enjoy without needing extra space.
Tennis Court Conversion
If you already have a tennis court, you can turn it into a pickleball court without starting from scratch. Simply add the correct pickleball lines and install a pickleball net. This is one of the easiest ways to create a backyard pickleball court.
Portable Pickleball Court
A portable pickleball court is a good choice if you do not want a permanent setup. You can use a portable net with temporary court lines on your driveway, patio, or any flat surface. It is quick to set up and easy to remove after the game.
Pickleball Court Kit
A pickleball court kit makes the job even easier. Most kits include a portable net, boundary lines, and other basic equipment you need to start playing. It is a great option for beginners who want a simple setup without building a permanent court.
H2: Common Mistakes to Avoid
- Building the court on uneven ground.
- Ignoring drainage before construction.
- Choosing the wrong court size.
- Skipping the concrete curing time.
- Using regular paint instead of court paint.
- Measuring court lines incorrectly.
- Installing the net at the wrong height.
- Forgetting to check the sun direction.
- Not planning your budget before starting.
- Adding lights or fencing too late without planning.
FAQs
How much space do I need?
For a standard pickleball court, you need at least 30 feet by 60 feet of space. This gives you enough room to move safely around the court while playing.
How to Build a Backyard Pickleball Court?
The official pickleball court measures 20 feet wide and 44 feet long. The court lines should be 2 inches wide, and the net should be 36 inches high at the sidelines and 34 inches high in the center.
Can I build a court on my driveway?
Yes. If your driveway is made of concrete, is flat, and has enough space, you can turn it into a backyard pickleball court by painting the lines and adding a portable or permanent net.
Can I convert a tennis court?
Yes. You can easily convert an existing tennis court by adding pickleball court lines and installing a pickleball net. Many people choose this option because it saves time and money.
What is the cheapest way to build a pickleball court?
The cheapest way is to use an existing concrete slab or driveway. You can paint the court yourself, use a portable net, and add fencing or lights later when your budget allows.
Are pickleball court kits worth it?
Yes. A pickleball court kit is a good option if you want a quick and simple setup. Most kits include a net, boundary lines, and basic equipment, making them perfect for beginners.
Conclusion
Building a backyard pickleball court takes some planning, but it is completely worth the effort. Start by choosing the right location, building a strong foundation, and picking a surface that fits your budget. Then paint the court, install the net, and add any extras you need.
I built my own backyard pickleball court, and it has become one of the best parts of my home. My family plays together almost every day, and we even enjoy games at night. If I can do it, you can too. Start planning today, and soon you’ll have your own backyard pickleball court to enjoy for years.
Pickleballcourtsfl.com is specially designed to find pickleball courts. That helps you to find pickleball courts easily. Simply search for ” near me pickleball courts.


Leave a Reply